
Joist tool: automate joist takeoff
Draw the floor or roof area, set the spacing, direction, pitch and stock-length rounding, and get every joist laid out and counted by length in one object.
The Joist Tool lays joists across an area at the spacing you give it and counts them by ordered length. You draw the area once; Plankore places every joist, rounds each to stock length and lists how many of each length you need.
Set it up
- Set the page scale first. Joist lengths need it.
- In the toolbar, click the chevron beside Smart Linear (Choose linear tool) and choose Joist Tool. Its tooltip reads Generate joists from an area.
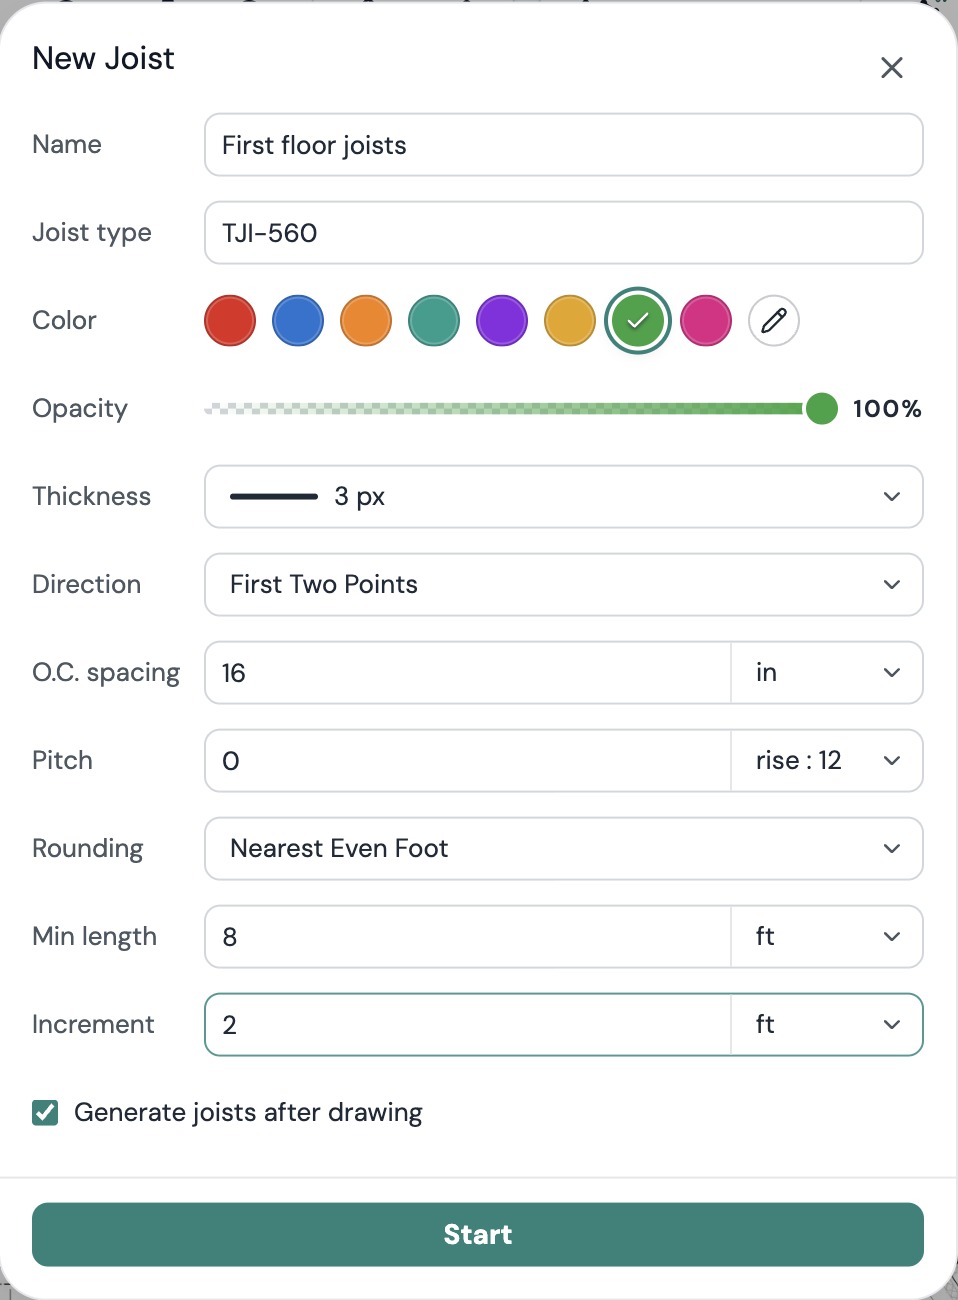
- The New Joist dialog opens. Fill it in:
- Name, for example First floor joists. Blank becomes Joist Takeoff.
- Joist type, for example TJI-560. It names the length buckets in your estimate.
- Colour, Opacity and Thickness for the lines on the canvas.
- Direction: First Two Points (you click two points to set the angle), Horizontal or Vertical.
- O.C. spacing with its unit (in, ft or m). The default is 24 in.
- Pitch for a sloped roof, as rise : 12, degrees or percent. Leave it at 0 for a flat floor.
- Rounding: how a joist's length becomes an ordered length. None (feet & inches), Nearest Foot, Nearest Even Foot (default) or Next even foot (+1 ft allowance). Metric projects offer Nearest 0.3 m, Nearest 0.6 m and Next 0.6 m (+0.3 m allowance).
- Min length and Increment: the shortest stock length and the step between lengths, for example 8 ft and 2 ft. Blank means ignore.
- Generate joists after drawing: untick it to get a preview step first.
- Click Start.
Draw the area and the direction
- The banner reads Joist area · Drag a rectangle, or click points for a polygon. Draw around the floor or roof bay. Hold Shift to keep an edge straight if Orthogonal is off.
- With First Two Points, the banner then reads Joist direction · Click two points to set the joist direction. Click two points along the way the joists run.
- If you unticked Generate joists after drawing, the banner reads Joist preview · Review the joists, then Generate. A popup titled with your name shows 24 joists · 288 ft total and a line per length bucket, such as TJI-560. 12 ft → 24 EA. Click Redraw to draw the area again, or Generate 24 joists.
The area itself isn't kept. Only the joists are saved.
What you get
One linear object in the Takeoff tab, with a section per joist. Its total is the ordered length of all joists. On the Estimates tab the object breaks down by bucket, so TJI-560. 12 ft and TJI-560. 14 ft each show a count in EA. See Build an estimate.
Change it afterwards
- Change the settings. In the Takeoff tab, open the object's Properties. The Joist section repeats the dialog: Joist type, Direction, O.C. spacing, Pitch, Rounding, Min length and Increment. Spacing, direction and pitch regenerate the joists; rounding and stock lengths refresh the buckets. Number fields apply on Enter or when you click away.
- Redraw the area. Right-click the object and choose Re-adjust area. The tool reopens with the settings and colour kept.
- Split at a beam. Right-click the object and choose Split joists. The banner reads Splitting joists · Click two points across the joists. Every joist the line crosses is cut there.
- Work on one joist. Select a single joist and open Properties. Under Joist actions, Add Double Joist places a second joist beside it and Split Joist cuts just that one where you click.
If something goes wrong
- The joists run the wrong way. Change Direction in Properties, or Re-adjust area and click the two direction points again.
- Lengths come out short of what I'd order. Set Rounding to Next even foot (+1 ft allowance), or set Min length and Increment to your supplier's stock.
- The row is greyed out or missing. Your plan doesn't include it, you have view-only access, or you're looking under plain Linear: it lives under Smart Linear's chevron.
Still need help?
Email hello@plankore.ai and we'll reply within 48 hours. So we can find your work quickly, include the email you sign in with and the name of the project.