
Build an estimate
Read the Estimates table, understand each column and how rows are grouped, edit names, descriptions and prices in place, and keep objects out of the total.
Everything you measure flows into Estimates, a spreadsheet-style view of your takeoff with a price on every line. Draw an object and it appears here with its quantity. Add unit costs by hand or apply templates, and the total builds itself.
Open the table
Click Estimates in the top navigation. The side panels close so the table has the whole width.
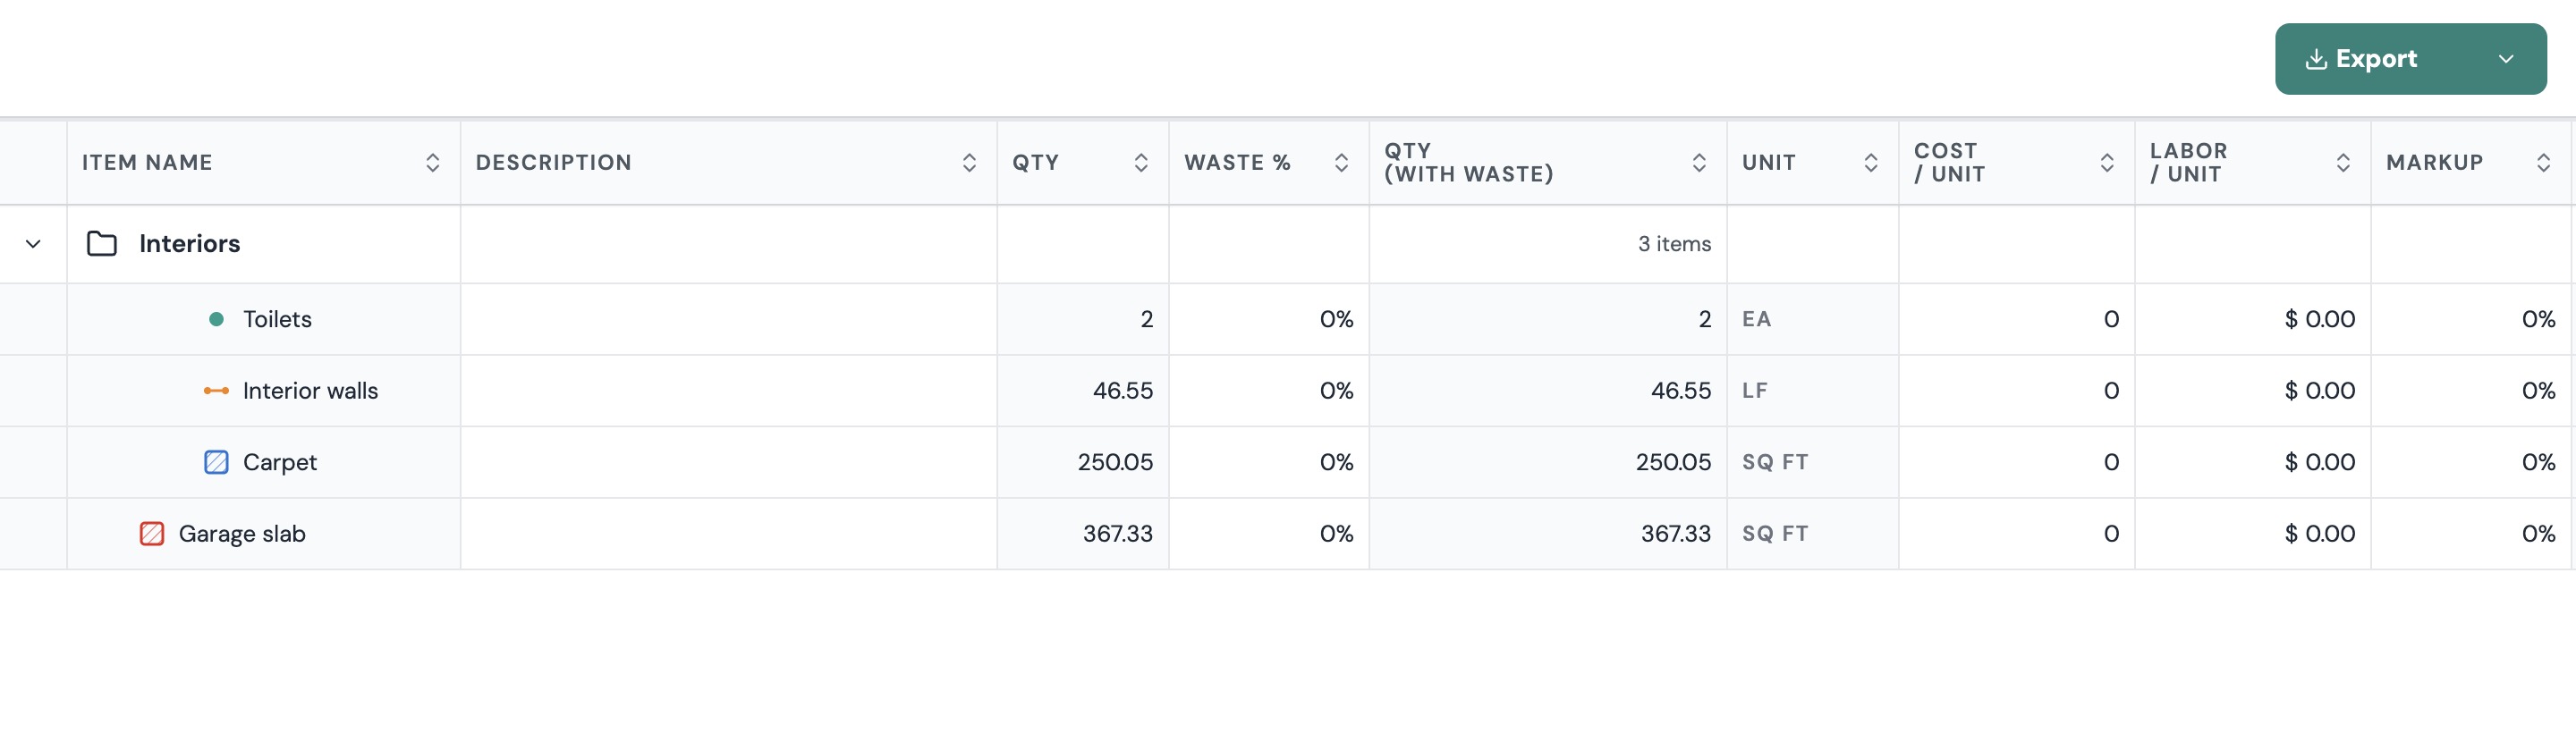
What each column means
| Column | What it is |
|---|---|
| Item name | The object's name from the Takeoff tab. Double-click to rename. |
| Description | Free text. Click to edit. |
| Qty | What you measured: area, length or count. |
| Waste % | An allowance added to the quantity. Type 10 for 10 %. |
| Qty (with waste) | Qty × (1 + Waste %). This is the quantity that gets priced. |
| Unit | SQ FT, LF or EA on an imperial project, M², M or EA on a metric one. |
| Cost / unit | Your material cost per unit. On template lines it also holds equipment, subcontract and other costs, and a badge on the row says which. |
| Labor / unit | Your labor cost per unit. |
| Markup | A percentage added to the line after it's priced. |
| Total price | Qty (with waste) × (Cost / unit + Labor / unit) × (1 + Markup). |
Click a header to sort, again to reverse, and a third time to restore the order. Drag a header's edge to resize it, or double-click the edge to reset. The bottom Total row shows the item count and the sum of every included line.
For the details of waste, markup and sales tax, see Add prices, waste, markup and sales tax.
How rows are grouped
Rows sit in the same folders you made in the Takeoff tab, so organizing your takeoff organizes your estimate. Each folder header shows its item count and subtotal, and clicking it collapses or expands the folder. See Organize takeoffs.
Drag a row to reorder it or drop it on a folder to move it. Right-click a row for Move to division, which files it under a CSI division, and for Show sections or Hide sections on objects drawn in several sections.
Lines that came from a template
An object with a template applied shows via templates in Cost / unit. Click its chevron to see each part as its own line, with a badge for Material, Labor, Equipment, Subcontractor or Other. Waste on these lines is set in the template. Hover it and Plankore says Set on the Assembly or Part this row came from. See Apply a template.
Price a line by hand
You don't need a template to price something. On any object row, click a cell and type:
- Waste %, if the material needs an allowance.
- Cost / unit and Labor / unit.
- Markup.
Press Enter or click away to save. Escape cancels. Total price updates as you go.
Keep an object out of the total
Some things are worth measuring but not pricing, such as an existing wall you drew for reference. An excluded object drops out of the table and the total, and a footer appears: N objects excluded from estimate. Click show list to see them, and Include to bring one back.
When the numbers are right, export them. See Export your estimate to Excel or PDF.
If something goes wrong
- "No estimate yet" means nothing has been drawn. Draw objects on a blueprint page to get started.
- "No priced objects yet" means objects exist but none are priced. Add costs on a row or apply a template.
- A cell won't take your edit. Viewers can read the estimate but not change it. Ask the owner for Can edit access. See Share a project and manage members.
- Quantities look wrong. Check the page scale. See Set the page scale.
Still need help?
Email hello@plankore.ai and we'll reply within 48 hours. So we can find your work quickly, include the email you sign in with and the name of the project.